
How to's
SCREENSHOTS
|
|
|
|
| Manual Method | ||
|
Manual Method to take Screenshots. It is assumed you are already in your game/sim. 1. Get a good 'pause' - as in real life photography - try to pay attention to background, set distance in View Options. You can achieve a reasonable result by setting this to around 500 feet then zooming in & panning round until you're happy with the image on the screen. |
 |
|
|
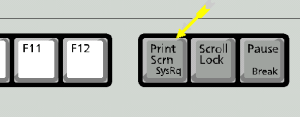
2. Press 'Print Screen' on your keyboard. Some systems allow for Shift/Print Screen - although mine does not. This will copy the screen image to your Clipboard ready to be pasted into a Paint program. |
 |
|
| 3. Start your Paint Program. I personally use Corel Photopaint for most of my stuff, but Paint Shop Pro, Photoshop & a host of others including MS Paint & Gimp (downloadable here) will work fine. For this demo I use MS Paint as everyone will have this. The principle is the same with all Paint Programs. | ||
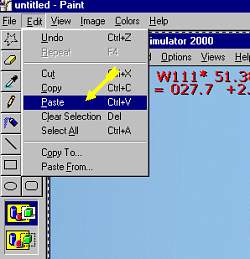
| 4. 'Paste' or 'New from Clipboard' or whatever your program requires. |  |
|
|
5. Now you have your screenshot. You can save now.! But >> I prefer to select an area of the image - which will be the final shot. Select an area - cut & paste again. |
 |
|
| 6. Resize - it's usually better to resize. |  |
|
|
7. Save as '.jpg' or '.gif.' - Most 'photo' style images work better as JPG's & most 'illustrative' images work better as 'gif' format. Most Sim images will work best if saved as a JPG. Happy Shootin!!!
|
||
-->